
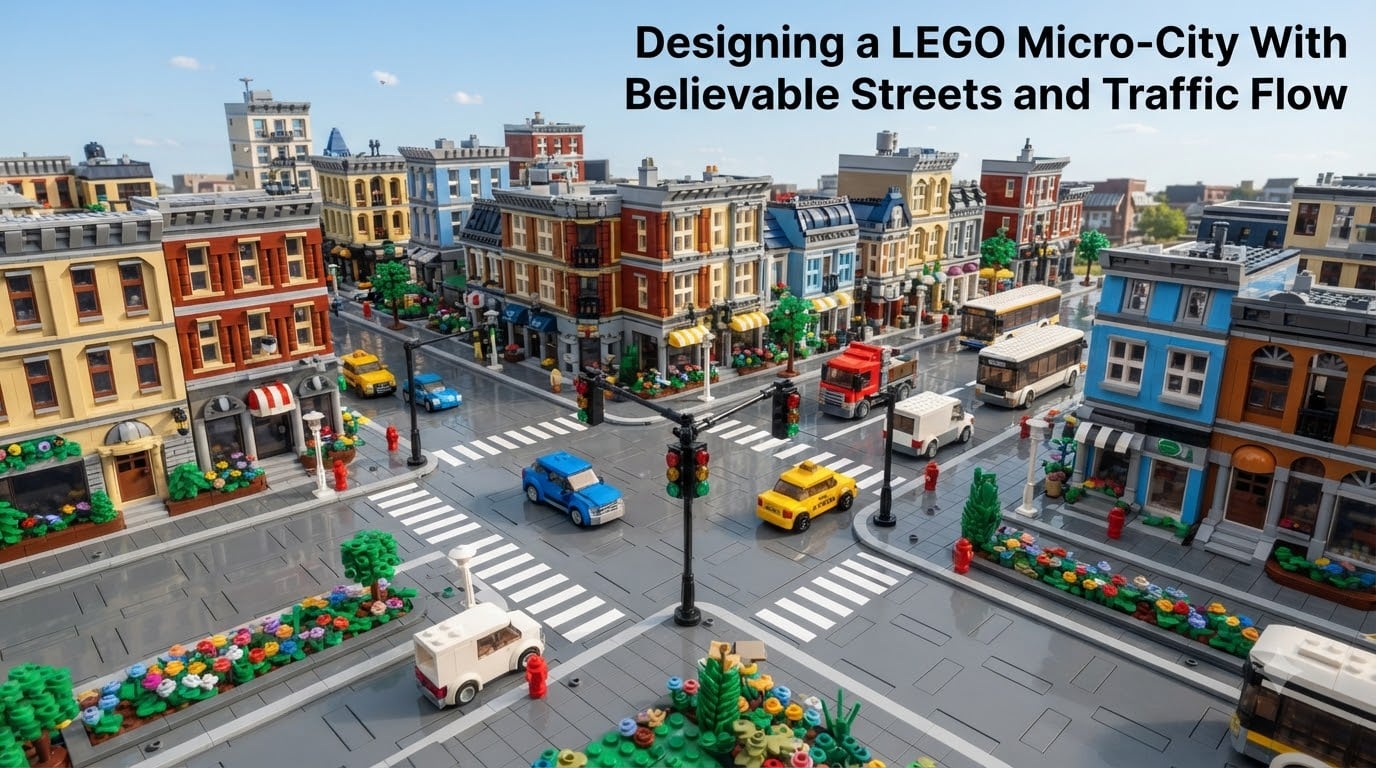
I’ve spent the last three years rebuilding my LEGO micro-city from scratch after I realized my streets looked like parking lots. The buildings were detailed, the minifigs were in scale, but the roads killed the illusion. That’s when I started studying real urban planning guides and discovered that believable LEGO streets follow the same logic as real ones. Traffic flow isn’t a decoration, it’s the spine of your city.
In this guide, I’ll walk you through the exact process I used to transform my LEGO micro-city from a static diorama into something that actually feels alive. You’ll learn how to plan traffic flow, choose between road plates and brick-built streets, design sidewalks that make sense, and add street furniture that pulls everything together. Whether you’re building a tabletop city on a 32×32 baseplate or filling a dedicated room, these techniques will make your streets look believable.
Table of Contents
Understanding Traffic Flow Basics for LEGO Micro-Cities
Before you place a single brick, you need to understand how traffic actually moves through a LEGO micro-city. I learned this the hard way after building three dead-end roads in a row. Real cities aren’t random, they follow patterns, and so should yours.
The first decision is your road hierarchy. Main arteries should be wider, four studs across for two lanes of traffic. Secondary roads can be three studs, and residential lanes can be two. This creates visual variety and tells a story about which areas are busy and which are quiet.
Grid layouts are the easiest to build but they look sterile. I prefer a hybrid approach with a main grid broken up by diagonal connectors and curved sections. This mimics how real cities evolved from planned grids into organic networks.
The Minifig Scale Rule for Lane Widths
A standard LEGO minifig vehicle is four studs wide. If you want two cars to pass each other, your road needs to be at least eight studs wide. For most micro-city builds, six to eight studs is the sweet spot. Anything narrower creates bottlenecks that look unrealistic even at minifig scale.
Intersection spacing matters more than you’d think. I keep intersections at least sixteen studs apart on main roads. This gives vehicles room to turn without blocking cross traffic. Closer intersections create constant congestion that looks wrong.
Why Continuity Wins Over Symmetry
I used to obsess over perfectly symmetrical street grids. Then I realized real cities aren’t symmetrical either. What matters is continuity, the road should flow naturally from one section to the next without sudden changes in width or direction. This is what makes traffic flow feel believable.
Road Construction Techniques: Plates vs Brick-Built Streets
There are three main ways to build LEGO roads, and each has tradeoffs. I’ve tried all three across different sections of my city, and the right choice depends on your goals.
Option 1: Pre-Made Road Plates
LEGO’s official road plates (the 16×16 and 32×32 sets) are the fastest way to get streets down. They come printed with lane markings, crosswalks, and curves. For a beginner or anyone building a quick layout, they’re unbeatable. The downside is uniformity, every plate looks the same, which can feel sterile.
The 16×16 plates work great for residential streets and small intersections. The 32×32 plates are better for main roads because they have more detailed printing and include bus lanes in some versions. I use road plates in my modular building districts where speed matters more than uniqueness.
Option 2: MILS (Modular Integrated Landing System)
MILS is a community-developed standard that uses baseplates as the foundation, then layers tiles and plates on top to create custom roads. It’s the gold standard for serious LEGO city builders because it gives you full control over road width, color, and markings.
The basic MILS road is a baseplate topped with a single layer of smooth tiles. You can add white tiles for lane markings, red tiles for crosswalks, and gray tiles for sidewalks. It takes longer than road plates, but the result looks ten times better. I’ve converted about 60% of my city to MILS because the customization is worth the effort.
Option 3: Brick-Built Roads
For the most realistic look, brick-built roads use actual LEGO bricks laid in patterns to mimic asphalt, cobblestone, or brick paving. This is where SNOT (Studs Not On Top) technique comes in, building sideways so the studs face outward instead of up, creating a smooth road surface.
Brick-built roads take the most time but offer the most character. I used this technique for my historic district with cobblestone streets. Each brick represents a cobblestone, and the slight irregularities actually add to the realism. Just budget extra time, a single street section can take a full evening.
Which Should You Choose?
For a quick build, start with road plates. For a long-term project you’ll keep expanding, invest in MILS. For showcase sections that need to impress, go brick-built. Most serious builders end up mixing all three based on the district’s character.
Sidewalk and Curb Design That Feels Real
Sidewalks are where most LEGO cities fall apart. Builders either skip them entirely or place them at the wrong height. After studying real street photography for months, I figured out the secret: sidewalks should be exactly one plate above the road surface, and they should be set back from the curb by at least one stud.
Building Standard Curbs
The easiest curb is a single row of 1×2 bricks on their side, placed along the road edge. This creates a clean step from road to sidewalk. For more detail, use slope bricks (part 6091) at a 45-degree angle. This gives the curb a beveled edge that looks more realistic and helps minifigs visually understand the boundary.
I keep my sidewalk width at three to four studs. Anything narrower feels cramped, anything wider wastes space you could use for buildings. For commercial districts, I push it to five studs to allow for outdoor seating and street furniture.
Curved Sidewalks Done Right
Curves are where sidewalk construction gets tricky. Straight curbs are simple, but curved corners require special techniques. The new arch element 80543 from the Lion Knights Castle set changed everything for me. It’s a 3×3 round corner piece that creates smooth, sweeping curves without visible seams.
Before that piece existed, I used a combination of quarter-circle tiles (part 37352) and wedge plates to build curves. The result looked decent but you could always see the joints. The arch element makes curves look like they were cast in one piece.
Flower Beds and Street Trees
Real sidewalks aren’t just concrete, they have life. I add small flower beds between the curb and the main walkway using green plates with a few flower elements on top. This breaks up the gray monotony and signals to viewers that someone cares about this street.
Street trees are another easy win. A brown technic axle with green leaves on top, anchored to a base, gives you an instant mature tree. Place one every six to eight studs along residential streets for a realistic canopy effect.
Intersections and Crosswalks for Safe Traffic Flow
Intersections are the heart of your traffic flow. A bad intersection creates confusion, a good one creates story. I treat every intersection in my city as a mini scene with its own character.
T-Intersections vs Crossroads
T-intersections are easier to build and more common in real cities than you’d think. They naturally slow traffic because vehicles can only turn one way. I use T-intersections in residential areas where I want a calm, low-traffic feel.
Crossroads (four-way intersections) need traffic control. Without traffic lights or stop signs, minifigs would be crashing constantly. I always add a traffic light to every crossroads in my city. It tells a story and solves a logic problem at the same time.
Roundabouts for Traffic Flow
My favorite intersection design is the roundabout. A central island with roads curving around it creates natural traffic flow without needing lights. I built one at the center of my city where four districts meet, and it’s become the visual anchor of the whole layout.
To build a roundabout, use a 4×4 round brick as the center island. Surround it with curved road plates or brick-built curves, leaving enough room for two vehicles to circulate. Add a small tree or fountain to the center for extra detail.
Crosswalk Construction
Crosswalks should be white stripes on a dark road. The simplest method uses white tiles laid across gray road plates at intersections. For a more realistic look, I use individual white plates with small gaps between them to mimic real painted crosswalks that have worn over time.
Position crosswalks one stud back from the curb. This gives minifigs a small buffer zone between the road and the sidewalk, just like in real cities. It also creates room for stop signs and signal poles.
Street Furniture Elements That Bring Your Streets to Life
Street furniture is the difference between a LEGO city that looks like a model and one that looks like a place. These small details tell viewers that someone lives here, someone works here, someone walks these streets every day.
Traffic Lights That Actually Work
I build all my traffic lights from scratch using a 1×1 brick with a trans-red round tile, a trans-yellow round tile, and a trans-green round tile stacked on top of each other. The whole assembly sits on a 1×2 plate attached to a black 1×1 technic brick for stability.
For the pole, I use a black technic pin with a long technic axle through it. This keeps the light at proper height, roughly eight bricks off the ground, matching real traffic light positioning. I place one at every multi-lane intersection, usually at the corner where two crosswalks meet.
Bollards, Railings, and Pedestrian Beacons
Bollards are the short posts that separate pedestrian areas from vehicle traffic. I build them from technic pins with a small 1×1 round plate on top. They’re perfect for protecting sidewalk cafes or marking the entrance to pedestrian zones.
Railings work great along elevated sidewalks or bridge approaches. I use fence elements (part 60592 from recent sets) attached to the sidewalk edge. They add vertical detail and clearly communicate where the safe boundary is.
Pedestrian crossing beacons are those flashing yellow lights at crosswalks. A single 1×1 brick with a trans-orange round tile, mounted on a black pole, does the job. I place these at mid-block crosswalks on busier streets.
Street Lamps and Signs
Street lamps transform a city from day to night. I use the modular building street lamp element wherever I need lighting. They’re consistent with official LEGO sets and look great in photographs. For tighter spaces, I build custom lamps from a black technic axle with a trans-yellow round tile on top.
Signs add another layer of story. Stop signs, yield signs, one-way arrows, street name signs, all of these are easy to print or build from 1×2 plates with tile decorations. I add street name signs at every intersection in my city. It sounds excessive, but it makes the city feel real.
Scale Consistency and the 5/2 Rule in LEGO Building
Scale is what separates a LEGO city from a LEGO pile of bricks. The single most important rule I’ve learned is the 5/2 rule, which states that every five plates of height should equal two bricks of height for proper minifig proportions.
This rule comes from the fact that a plate is one-third the height of a brick. Three plates equal one brick, so five plates equal one and two-thirds bricks, which is close enough to two bricks for minifig scale consistency. I keep this ratio in mind whenever I stack elements vertically.
SNOT Technique Basics
SNOT stands for Studs Not On Top, and it’s essential for any detailed street work. The basic idea is to build sideways so studs face outward instead of up, creating smooth surfaces where you need them. For streets, this means using SNOT to create smooth road surfaces without visible studs.
The simplest SNOT technique uses a plate with studs on the side (part 3023 or 3022) attached to another plate, creating an L-shape. You can build entire structures this way, and it’s the foundation for advanced detailing like smooth walls, hidden studs, and angled surfaces.
Common Illegal Techniques
Illegal LEGO techniques are connections that stress the bricks or look unstable. Clipping only one stud of a brick onto another is technically illegal because it puts uneven pressure on the connection. The same goes for bending elements past their design limits.
That said, most serious builders use some illegal techniques. I clip single studs on hidden connections where stability doesn’t matter. The key is knowing when it’s acceptable and when it will cause problems later. If the connection is visible and load-bearing, go legal. If it’s hidden and decorative, illegal is fine.
Planning Your LEGO Micro-City Layout Before You Build
Every successful LEGO city I’ve built started with a sketch. Not a fancy CAD design, just a piece of graph paper where I drew rough rectangles for baseplates and lines for streets. This ten-minute investment saved me hours of rebuilding.
Start by identifying your main road. This is the spine of your city, the road everything else connects to. For most micro-cities, a single main road running east-west works well. Then add a secondary north-south road to create your central crossroads.
Baseplate Arrangement
Baseplates come in standard sizes, 16×16, 32×32, and 48×48 studs being the most common. I arrange mine in a grid pattern with main roads running between baseplates rather than across them. This way I can swap out districts without rebuilding the whole city.
For a small micro-city, four 32×32 baseplates arranged in a 2×2 grid gives you 64×64 studs of space. That’s enough for a downtown with about twelve buildings and full street detail. For larger builds, you can keep adding baseplates in any direction.
Theme Clustering
Real cities have zoning, areas for commerce, areas for housing, areas for industry. Your LEGO city should too. I cluster commercial buildings near my main intersection, residential areas in quieter corners, and industrial zones along the edge where noise and traffic don’t matter.
Theme clustering also makes the city more interesting visually. A block of colorful shop fronts next to a row of brownstone houses next to a factory with smokestacks tells a story. Random placement just looks random.
Future Expansion Planning
Always leave room for expansion. I keep at least one full baseplate of empty space at the edge of my city for future districts. This prevents the common mistake of building yourself into a corner where the only way to add a new section is to tear down existing work.
Frequently Asked Questions
What is the 5/2 rule in LEGO?
The 5/2 rule in LEGO building states that every five plates of vertical height should equal two bricks of height to maintain proper minifig scale proportions. This works because one brick equals three plates in height, so five plates roughly matches two bricks. Following this rule keeps your buildings, sidewalks, and street elements visually consistent throughout your city.
What is an illegal LEGO build technique?
An illegal LEGO build technique is any connection that stresses the bricks, looks unstable, or wasn’t intended by the original designers. Common illegal techniques include clipping only one stud of a brick onto another, bending flexible elements past their design limits, and forcing pieces together that weren’t meant to connect. Most builders use some illegal techniques for hidden connections, but visible load-bearing connections should always be legal builds.
How to make a LEGO City look good?
To make a LEGO city look good, focus on three core elements: believable street design with proper lane widths and intersections, consistent scale using the 5/2 rule throughout, and street-level detail like sidewalks, curbs, traffic lights, and signage. Clustering buildings by theme (commercial, residential, industrial) creates visual story. Finally, add street furniture like lamps, bollards, and flower beds to break up empty spaces and signal that the city is lived-in.
How much would it cost to build a LEGO City?
A small LEGO micro-city on four 32×32 baseplates typically costs between $200 and $500 depending on whether you buy new sets or source parts from BrickLink. A medium-sized city filling a 6×8 foot table can run $1,000 to $3,000. Large permanent LEGO cities often cost $10,000 or more and take years to build. Budget-conscious builders can start with official road plates and modular buildings, then expand with custom brick-built sections over time.
What is MILS in LEGO building?
MILS stands for Modular Integrated Landing System, a community-developed standard for LEGO city building. It uses baseplates as foundations with smooth tiles and plates layered on top to create fully customizable roads, sidewalks, and plazas. MILS gives builders complete control over road width, color, markings, and texture. It’s the gold standard for serious LEGO city builders who want professional-looking streets beyond what official road plates offer.
What is the SNOT technique in LEGO building?
SNOT stands for Studs Not On Top, a LEGO building technique where you construct sideways so studs face outward instead of upward. This creates smooth surfaces on the sides of builds, which is essential for realistic road surfaces, finished walls, and angled details. SNOT uses special plates with side-mounted studs (parts 3023 and 3022) to create L-shapes and complex orientations that traditional top-stud building can’t achieve.
Start Building Your LEGO Micro-City Today
Believable streets and traffic flow are what transform a LEGO micro-city from a collection of buildings into a living place. Start with a single baseplate and one road section. Get the lane width right, add a proper sidewalk with a curb, and place one traffic light at the intersection. That single corner will teach you more than reading any guide.
From there, expand outward. Add a second baseplate, connect it with a road that matches the first section’s width and height. Build a few buildings, set them back from the street at proper sidewalk distance, and watch the LEGO micro-city start to feel real. Traffic flow emerges naturally when you follow these principles consistently.
Remember, the goal isn’t perfection on the first build. My first attempt had roads that didn’t connect, sidewalks at the wrong height, and intersections that made no sense. Each rebuild taught me something new. Your city will evolve the same way. Stick with it, share your progress with the AFOL community, and enjoy the process of designing LEGO micro-city streets that actually work.