
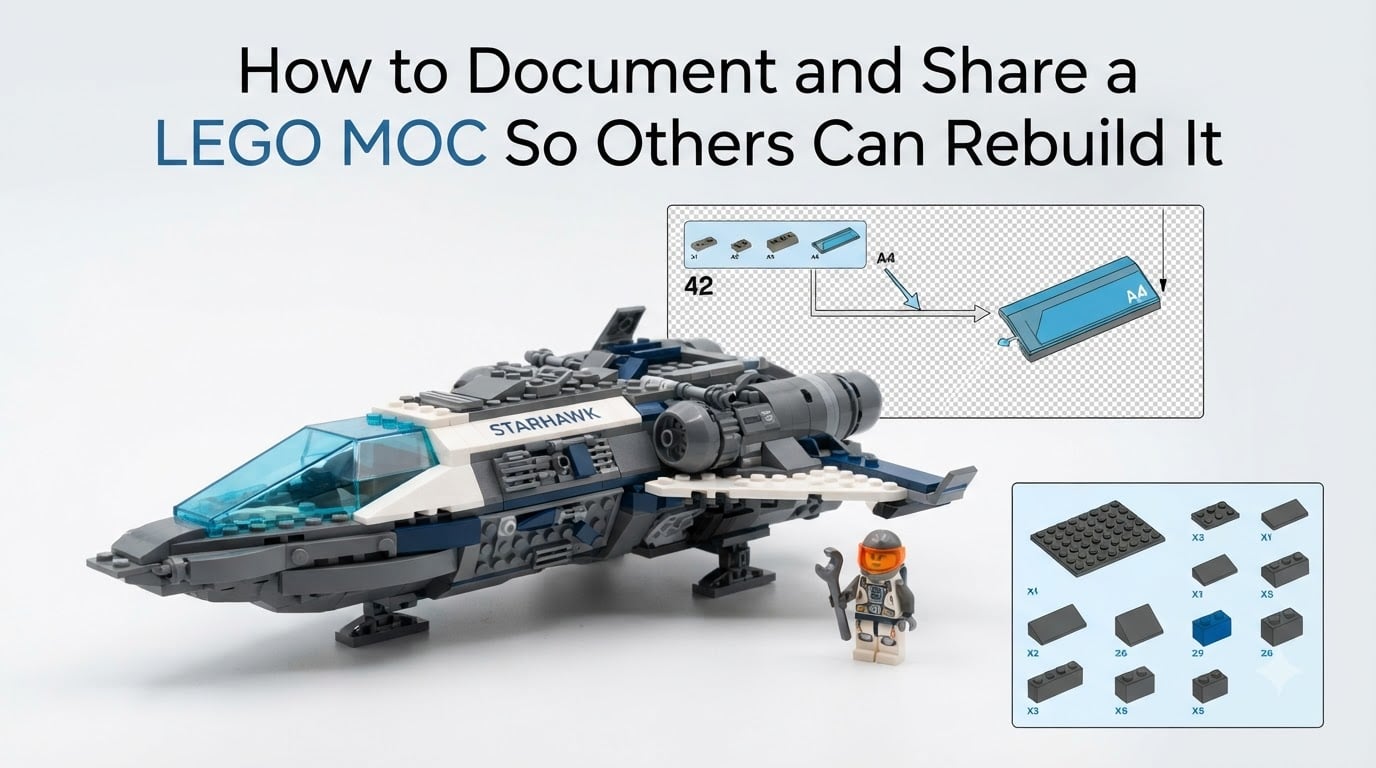
You just finished a LEGO MOC you are genuinely proud of. The build looks great, the techniques click, and you want someone else to experience the joy of putting it together. But without clear instructions, a parts list, and photos, your creation stays locked in your own collection.
Learning how to document and share a LEGO MOC so others can rebuild it is what separates a one-time build from something the community can enjoy for years. The good news is that the process is more accessible than ever. Free digital tools, dedicated sharing platforms, and active communities make publishing your designs straightforward.
In this guide, I will walk you through the full workflow I use. We will cover digital building tools like Stud.io and Bricklink Studio, creating step-by-step instructions, organizing your parts inventory, photographing and rendering your model, choosing the right sharing platform, protecting your work, and pricing instructions if you decide to sell them.
Whether you are sharing your first alternate build or selling premium instructions on Rebrickable, this guide gives you a clear path from finished model to published MOC.
Table of Contents
What Is a LEGO MOC and Why Document It
A LEGO MOC stands for My Own Creation. It is any custom LEGO design built by an individual rather than from an official LEGO set. MOCs range from small alternate builds made from a single set to massive, thousand-piece cityscapes and spacecraft.
Documentation is the bridge between building and sharing. When you document a MOC, you capture everything another builder needs to recreate it: a step-by-step building sequence, a complete parts list, photos or renders showing the finished model, and notes on tricky techniques.
Without documentation, a MOC exists only in photos. People can admire it, but they cannot rebuild it. Forum discussions across Reddit and Eurobricks repeatedly highlight this gap. Builders love seeing custom creations, but the most common request in every comment section is the same: “Are instructions available?”
I have seen incredible MOCs fade into obscurity because the builder never documented them. I have also watched modest builds gain thousands of downloads because the instructions were clear, the parts list was accurate, and the photos showed every angle.
Proper documentation also helps you. Building digitally forces you to refine your design, catch structural weaknesses, and discover missing pieces before you source parts. It turns a one-off build into a repeatable, shareable creation.
How to Document and Share a LEGO MOC: Tools You Need
The right tools make the documentation process faster and more accurate. Here are the three categories you should set up before starting.
Digital Building Software
Bricklink Studio (often just called Studio) is the most popular choice among MOC builders right now. It is free, regularly updated, and includes a built-in instruction generator that converts your digital model into step-by-step PDFs. Studio also has a photo-realistic rendering engine, so you can produce polished images without ever picking up a camera.
Stud.io is the predecessor to Studio and shares much of the same lineage. Many builders still use Stud.io alongside Studio because of its familiarity. The key advantage of either tool is access to the full BrickLink parts catalog, which means every piece in your digital model matches a real, sourceable part.
LEGO Digital Designer (LDD) was LEGO’s official digital building tool. LEGO officially retired it, but some builders still use older versions. I would not recommend starting with LDD in 2026 because the parts catalog is frozen and the instruction features are limited compared to Studio.
Parts Catalog and Sourcing
BrickLink is the largest LEGO marketplace and the backbone of parts sourcing. When Studio exports your parts list, it generates a format compatible with BrickLink wanted lists. This lets other builders instantly find every piece they need and order it.
Rebrickable also maintains a parts database and integrates with BrickLink. I recommend cross-referencing both when you source rare or unusual pieces.
Photography and Image Editing
If you want to photograph your physical build instead of rendering digitally, you need a clean backdrop, even lighting, and a decent camera. A smartphone works fine if your lighting is consistent. A light tent or a sheet of white poster board behind the model handles most backdrop needs.
For editing, free tools like GIMP or Photopea handle cropping, color correction, and adding text labels to your images.
Creating Step-by-Step MOC Instructions
This is the heart of MOC documentation. Clear instructions are what make a build rebuildable. Here is the workflow I follow every time.
Step 1: Build Your Model Digitally
Open Studio and reconstruct your physical MOC piece by piece in the digital workspace. Take your time here. Every piece in the digital file must match your physical build exactly, including color and orientation.
If you designed the MOC digitally from the start, you can skip the reconstruction. Either way, your digital model is the source of truth for everything that follows.
Step 2: Define Building Steps
Studio lets you assign pieces to steps. Think about how someone would physically assemble your model. Add a few pieces per step, not the entire structure at once. Each step should represent a logical sub-assembly that a builder can complete in under a minute.
Group related pieces together. If you are building a wall section, place all the bricks for that section in one step before moving on. If a technique requires explaining, add a callout note to that step.
Step 3: Generate the Instruction PDF
Once your steps are defined, Studio generates a PDF instruction booklet automatically. Review the generated document carefully. Look for steps that feel cramped, views that hide critical connections, or parts that appear to float without context.
Adjust the camera angle for any confusing steps. Studio lets you rotate the view per step, which is one of the most useful features for showing internal connections and SNOT (Studs Not On Top) techniques.
Step 4: Add a Cover and Scale Reference
Open the PDF in an editor and add a cover page with your MOC name, your builder handle, and a hero image of the finished model. Include a scale reference on the first page, such as a minifigure or a standard brick, so builders understand the size before they start.
Include a brief difficulty rating. Marking a build as Beginner, Intermediate, or Advanced helps the right audience find it.
Step 5: Test With a Fresh Build
Before publishing, ask a friend or fellow builder to follow your instructions from scratch without you present. Watch where they hesitate, where they backtrack, and where they ask questions. Those friction points are exactly where your instructions need revision.
This testing step is what separates good instructions from great ones. I have caught missing steps, unclear angles, and color-coding errors every single time I have done this.
Organizing Your Parts List and Inventory
A complete parts list is non-negotiable. Without it, no one can rebuild your MOC. Here is how to get it right.
Studio generates a parts inventory automatically from your digital model. Export this list as an XML file, which is the standard format that BrickLink and Rebrickable both accept. The XML includes part numbers, colors, and quantities for every piece.
Review the list manually before publishing. Check for rare or discontinued parts that might frustrate builders. If a piece is hard to source, note it in your documentation and offer an alternative if possible.
Color accuracy matters more than you might think. LEGO uses specific names and codes for each color. A “light bluish gray” is different from a “dark bluish gray,” and getting this wrong means builders order the wrong pieces. Studio handles color codes automatically, but double-check any custom colors you applied.
Include the total piece count prominently in your documentation. Builders use this number to estimate cost and decide whether a project fits their collection.
If you sell instructions on Rebrickable, the platform cross-references your parts list against its database and warns buyers about missing or unavailable pieces. This built-in check is one reason Rebrickable is the most trusted platform in the community.
Photographing and Rendering Your MOC
Visuals sell your MOC. Whether you use photos or renders, the goal is the same: show the model clearly from multiple angles so builders know exactly what they are aiming for.
Photography Tips
Use a plain white or light gray background. Set up two light sources at 45-degree angles to eliminate harsh shadows. Photograph the model from front, back, both sides, top, and at least one three-quarter view.
Capture close-up shots of any unique techniques or details. These detail shots are what experienced builders look for when evaluating whether a MOC teaches them something new.
Rendering in Studio
Studio’s rendering engine produces photo-realistic images from your digital model. Adjust the render settings to control lighting, background color, and image resolution. Higher quality renders take longer but look noticeably more professional.
I render at least five angles for every MOC I publish. Renders have an advantage over photos because you can position the camera anywhere, including inside the model, to show internal structure.
Scale and Reference Shots
Always include at least one image with a minifigure or a standard 2×4 brick next to your model. This gives viewers an instant sense of scale that isolated renders cannot convey.
Best Platforms to Share LEGO MOC Designs
Choosing where to publish affects who sees your MOC and how the community engages with it. Here is a breakdown of the main platforms.
Rebrickable
Rebrickable is the largest dedicated LEGO MOC platform. It hosts thousands of custom builds with instructions, parts lists, and community reviews. You can offer instructions for free or sell them through the platform.
Rebrickable integrates directly with BrickLink for parts sourcing, so a builder can purchase every piece for your MOC with a few clicks. The site also includes piracy protection features for paid instructions, including watermarks and download tracking.
If you publish on only one platform, make it Rebrickable. Forum users across Reddit and Eurobricks consistently recommend it as the first stop for MOC sharing.
Eurobricks
Eurobricks is the longest-running LEGO fan forum. It does not host instructions directly, but it is the best place to showcase your MOC, get feedback from experienced builders, and link to your Rebrickable page.
Post your MOC in the relevant theme forum with high-quality photos, a description of your building techniques, and a link to instructions. The feedback you receive on Eurobricks tends to be detailed and technical, which is invaluable for refining your designs.
Reddit (r/legomoc and r/lego)
Reddit’s LEGO communities are large and active. Post your MOC with an engaging title, a hero image, and a comment with links to instructions. Reddit drives significant traffic, especially if your build hits the front page of a subreddit.
Be genuine in your posts. The community responds to builders who share their process, not just finished photos. Talk about what inspired the build, what techniques you used, and what challenges you overcame.
Platform Comparison
Rebrickable offers the best infrastructure for hosting instructions and parts lists. Eurobricks provides the deepest technical feedback. Reddit delivers the widest reach. Most successful MOC builders use all three in combination: publish on Rebrickable, showcase on Eurobricks, and promote on Reddit.
Protecting Your MOC Instructions from Theft
MOC theft is a real concern, especially for paid instructions. Once you publish a PDF online, someone can copy and redistribute it. Here is how to reduce that risk.
Watermark Your Instructions
Add a subtle watermark with the buyer’s username or transaction ID to each page of your PDF. Rebrickable’s premium seller tools automate this process for paid instructions. If a copy leaks, the watermark traces it back to the original buyer.
Avoid heavy watermarks that obscure the build steps. A light, repeated pattern in the page margin is enough to identify the source without ruining the building experience.
Understand Copyright Basics
Your original MOC design and your custom instructions are your intellectual property. You own the copyright to the instructions you create, including the photographs, the step layout, and any written explanations.
However, you do not own the LEGO parts themselves or the LEGO brand. This distinction matters when selling instructions. You are selling your documentation, not the physical pieces.
Use Platform Protections
Rebrickable’s premium account includes download tracking, automatic watermarks, and DMCA takedown support. If you find your instructions being resold without permission, file a takedown notice with the hosting platform.
Keep a change log documenting when you created and first published your MOC. This timestamped record strengthens your claim if a dispute arises over originality.
Pricing Strategy for Selling MOC Instructions
Deciding what to charge for instructions is one of the most common questions in the MOC community. Here is a practical framework.
Start by looking at similar MOCs on Rebrickable. Filter by piece count and theme to find comparable builds. Most paid instructions range from a few dollars for small builds to fifteen or twenty dollars for large, complex models with detailed documentation.
Consider the time you invested. A MOC that took weeks to design, document, and test commands a higher price than a quick alternate build. Be transparent about what buyers get: number of pages, piece count, difficulty level, and any bonus content like alternate color schemes.
Offering a free tier alongside paid instructions is a proven strategy. Release a small, free MOC to build your reputation, then offer larger paid builds once the community trusts your instruction quality.
Price consistency matters. Once you set a standard for your builds, stick to it so buyers know what to expect. Sudden price jumps without a clear reason in build size or complexity erode trust.
FAQs
Is it legal to sell LEGO MOCs?
Yes, it is legal to sell original MOC instructions you create yourself. You are selling your documentation and design, not LEGO branded products. You cannot sell physical builds using LEGO’s name or logos without permission, and you should not replicate copyrighted characters or licensed designs.
What is the best way to document a LEGO MOC?
The best way to document a LEGO MOC is to rebuild it digitally in Bricklink Studio, define clear building steps, generate an instruction PDF, export a complete parts list as an XML file, and photograph or render the model from multiple angles. Test your instructions with another builder before publishing.
Where can I upload my LEGO MOC?
Rebrickable is the largest and most trusted platform for uploading MOCs with instructions and parts lists. Eurobricks and Reddit’s r/legomoc are excellent for showcasing builds and linking to your instructions. Most builders use all three in combination.
How do I protect my LEGO MOC instructions from theft?
Add watermarks with buyer IDs to each page of your PDF, use Rebrickable’s premium seller protections for download tracking and DMCA support, and keep a timestamped change log of when you created and published your MOC to support originality claims.
What is the 5/2 rule in LEGO?
The 5/2 rule refers to the proportion where five studs equal two bricks in height. This relationship is the foundation of LEGO SNOT techniques, allowing builders to integrate sideways-built sections seamlessly with standard vertical construction.
Conclusion
Documenting and sharing a LEGO MOC transforms a personal project into a community resource. By building digitally in Studio, creating clear step-by-step instructions, exporting an accurate parts list, and publishing on Rebrickable, you give other builders everything they need to recreate your work.
The process takes effort, but the payoff is real. Every builder who reconstructs your design, leaves a review, or reaches out with feedback extends the life of your creation far beyond your own build table. Start with a small MOC, follow the workflow above, and publish your first set of instructions this week.