
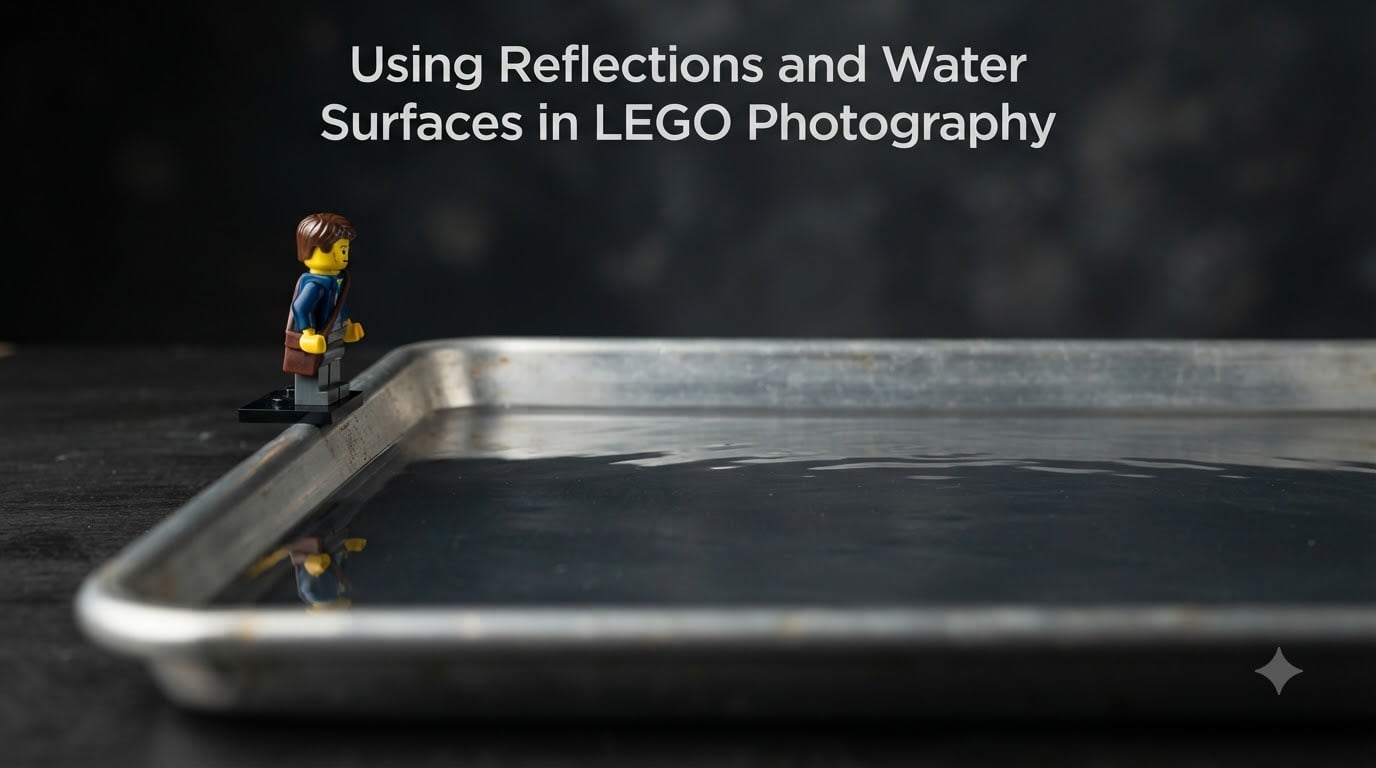
I have spent years photographing LEGO builds, and nothing transforms a simple scene faster than adding water. LEGO photography water reflections create a sense of depth and drama that plain backgrounds simply cannot match. A minifigure standing at the edge of a still lake, a pirate ship floating on a colored ocean, or a diver submerged beneath a rippled surface — these shots stop people from scrolling.
In this guide, I will walk you through everything you need to know about using reflections and water surfaces in LEGO photography. We will cover the basic setup, water effect techniques, lighting, camera settings, underwater shots, and the mistakes that ruin otherwise great photos. Whether you shoot with a DSLR or a smartphone, these techniques work with real water and everyday household items.
The best part is that you do not need expensive gear to get started. A baking tray, some tap water, food coloring, and diffused lighting will take you a long way. Let me show you exactly how I set up my shots and the settings I use to get clean, striking reflections every time.
Table of Contents
Why Water Reflections Transform LEGO Photography
Reflections add instant visual interest to any LEGO scene by creating symmetry and depth. When a viewer sees a minifigure reflected in still water, their brain reads the image as more real and more immersive than a flat-background shot. The reflection doubles the storytelling power of your scene.
LEGO photography is all about creating a believable miniature world. Shiny plastic surfaces already catch light in interesting ways, and water amplifies that effect. A calm water surface acts like a mirror, giving you a second copy of your subject that feels cinematic. A rippled surface adds movement and tension, perfect for storm or action scenes.
I have found that images with water reflections consistently get more engagement on social media than dry setups. The reason is simple: reflections are visually unusual in toy photography. Most creators shoot against printed backdrops or sky. Adding real water immediately sets your work apart from the crowd.
Reflections also solve composition problems. If your scene feels empty in the lower third, a water reflection fills that space naturally without looking forced. It grounds your subject and gives the image a balanced, intentional feel.
What You Need: Essential Gear for LEGO Photography Water Reflections
The core setup for LEGO photography water reflections is simple: a waterproof container, clean water, your LEGO model, a camera, and diffused lighting. I will break down each component so you can assemble your kit without overspending.
Containers
A shallow baking tray is the single most useful container for LEGO water photography. I use a 9 by 13 inch glass baking dish because it gives me enough surface area for reflection shots while keeping water depth manageable at about 1 to 2 inches. Glass containers let you shoot from below or through the sides, which opens up creative angles.
For deeper water effects or underwater shots, a larger plastic storage container works well. Avoid anything with textured bottoms, since those textures show through in your photos and break the illusion of a natural water body.
Water and Additives
Plain tap water is your starting point. For clear reflection shots, still tap water works perfectly. For colored or opaque water effects, you will need liquid food coloring (blue and green are most useful) and optionally a small amount of milk. I keep a set of gel food colors on hand because they mix more evenly than liquid drops.
Camera Options
A DSLR or mirrorless camera gives you the most control over aperture, shutter speed, and ISO. But a modern smartphone with manual controls or a pro camera app will absolutely work for LEGO photography water reflections. I started with a phone camera and still use one for quick tests before switching to my DSLR for final shots.
Lighting
Diffused artificial lights are the gold standard for indoor LEGO photography. I use two LED panel lights with softbox diffusers positioned at 45-degree angles on either side of my scene. Avoid using your camera flash directly, because it creates harsh glare on both the shiny LEGO plastic and the water surface.
Natural window light works if you diffuse it with a white sheet or curtain. The key is soft, even illumination that wraps around your subject without creating hot spots on the water.
Optional Filters
A circular polarizer filter helps control reflections on the water surface, letting you decide how much of the reflection to show versus what is visible beneath the water. A neutral density (ND) filter allows you to use longer shutter speeds in bright conditions, which is useful if you want to smooth out water movement for a glassy effect.
Transparent LEGO Bricks
Transparent LEGO bricks are a secret weapon for water photography. I use transparent 1×1 and 1×2 bricks as invisible supports to hold minifigures at specific heights in the water. Because they are clear, they disappear beneath the surface, making it look like your subject is floating or standing on water.
Setting Up Your First Water Reflection Shot
Here is the exact step-by-step process I follow for every LEGO water reflection shoot. This setup takes about 15 minutes once you have your materials ready.
Step 1: Fill Your Container
Place your baking tray on a sturdy, level surface and fill it with about 1 inch of room-temperature tap water. Cold water creates condensation on nearby surfaces, and warm water evaporates faster during long shoots. Let the water settle for 2 to 3 minutes so any bubbles dissipate and the surface becomes perfectly still.
Step 2: Position Your LEGO Model
Place your minifigure or build at the edge of the water or partially in it, depending on your scene. For a classic reflection shot, position the model about 1 to 2 inches back from the water’s edge so the reflection has room to form. Use transparent bricks under the water if you need to support a figure at a specific depth.
Step 3: Set Your Camera Angle
Lower your camera to near eye level with your LEGO subject. This is the most important angle choice for LEGO photography because it makes the miniature world feel life-sized. Shoot slightly downward at about 10 to 15 degrees so you capture both the subject and its reflection in the frame. Too steep an angle kills the reflection; too shallow an angle and the reflection dominates the subject.
Step 4: Configure Lighting
Position your diffused lights at 45-degree angles from your subject. Adjust the intensity so the light falls evenly across both the LEGO model and the water surface. If you see bright glare spots on the water, reduce the light intensity or move the lights further to the side. The goal is soft, wraparound light with no hard reflections.
Step 5: Set Camera Exposure and Shoot
Start with ISO 100 or 200, aperture around f/8, and adjust shutter speed based on your lighting. Take a test shot and check the histogram to make sure highlights are not blown out on the shiny LEGO surfaces. The reflection should be visible but slightly darker than the subject itself, which is what makes it look natural.
Quick tip: If the reflection is too faint, lower your camera angle slightly. If the reflection is too strong and distracting, raise the angle or add a tiny ripple to the water surface to break it up.
Creating Different Water Effects
The beauty of LEGO photography water reflections is that you can completely change the mood of a scene by adjusting what is in the water. Here are the three main water effect categories I use and exactly how to achieve each one.
Clear Water: Perfect Mirror Reflections
Clear still water produces the strongest mirror reflections. This is the effect to use when you want a serene lake, a calm harbor, or a dramatic symmetrical composition. The key is absolute stillness: any vibration or air current will distort the reflection.
To get the clearest reflection, let the water rest for several minutes after filling. Avoid breathing directly over the water surface while shooting, because even slight air movement creates micro-ripples. Use a remote shutter release or your camera’s timer to avoid touching the camera during exposure.
For clear water where you also want to show something beneath the surface (like a submerged LEGO treasure chest), keep the water shallow at about half an inch. The thinner the water layer, the less distortion you get between the surface and the object below.
Opaque Water with Food Coloring and Milk
Opaque water hides what is beneath the surface and creates a more realistic look for ocean, swamp, or storm scenes. There are two main approaches I use, and each produces a distinctly different result.
Food coloring is my go-to for colored water effects. Add 2 to 3 drops of blue food coloring to a baking tray of water and stir gently. For deeper ocean tones, add a single drop of green. For murky swamp water, use 1 drop of green and 1 drop of brown or yellow. Food coloring tints the water without making it fully opaque, so you still get subtle reflections on the surface.
Milk mixture creates genuinely opaque water that blocks the view of anything below the surface. I add about 1 tablespoon of milk to a tray of water and stir thoroughly. The milk proteins scatter light, giving the water a cloudy, milky-white appearance. For colored opaque water, add food coloring to the milk mixture. This is perfect for hiding the transparent support bricks holding your LEGO figures in position.
The comparison matters: food coloring gives you translucent colored water with visible reflections, while milk gives you opaque water with no reflections but complete concealment below the surface. I often use food coloring for calmer scenes and milk for action shots where I need to hide my support structures.
How to Create Realistic Ripples
Ripples add energy and movement to your water surface, and they distort reflections in visually interesting ways. Controlling ripples is one of the most requested techniques in LEGO photography water reflections, and it comes down to two methods.
Controlled disturbance: Use a toothpick or a small paintbrush to gently tap the water surface near one edge of your container. A single tap creates a ring of ripples that spreads outward. The size of the ripple depends on how hard you tap and how deep the tool goes. Practice this a few times before shooting to get a feel for the effect.
Breath technique: A very gentle exhale across the water surface from about 12 inches away creates subtle, widespread ripples. This produces a natural-looking disturbed surface, like a light wind blowing across a lake. I use this for outdoor scene simulations.
For capturing ripples, use a faster shutter speed of 1/200 or higher to freeze the motion. If you want a softer, more dreamlike ripple effect, use a slower shutter speed of 1/30 or below to let the movement blur slightly. Experiment with both to find the look that matches your scene.
Lighting Techniques for Better Water Reflections
Diffused side lighting is the single most effective lighting setup for LEGO photography water reflections. It illuminates your subject evenly while keeping the water surface free of harsh glare spots. Here is how I configure lighting for different effects.
Side lighting at 45 degrees from each side creates soft, balanced illumination that wraps around your LEGO model and lights the water surface evenly. This is my default setup for most reflection shots. The diffusers scatter the light so there are no hard reflections bouncing off the shiny plastic into the camera lens.
Top lighting works for underwater or deep-water scenes where you want light to penetrate the water. Position a diffused light directly above the container and shoot from a low angle. The light passes through the water and illuminates submerged objects, creating a glowing effect that works well for underwater diving scenes.
Backlighting creates dramatic silhouettes and highlights the water surface texture. Place a light behind the container, aimed toward the camera. This produces rim lighting on your LEGO model and makes ripples on the water surface glow. It is a high-impact look for sunset or dramatic weather scenes.
The biggest lighting mistake in LEGO photography is using bare, undiffused light sources. Shiny LEGO plastic and water are both highly reflective, so any hard light source creates bright glare spots that ruin the image. Always diffuse your lights with softboxes, white fabric, or even a sheet of white paper.
If you are still seeing glare on the LEGO surfaces after diffusing, try moving your lights further to the side. The further off-axis the light is from your camera, the less glare you will see. A polarizer filter can also reduce surface glare on the water, giving you more control over how much reflection appears.
Camera Settings for LEGO Photography Water Reflections
The best camera settings for LEGO photography water reflections are low ISO, a moderately narrow aperture, and a shutter speed matched to your water effect. Here is exactly what I recommend for different scenarios.
ISO
Keep your ISO at 100 or 200 whenever possible. LEGO plastic is smooth and detailed, and higher ISO settings introduce noise that makes those clean surfaces look grainy. Since you are using artificial lighting or a tripod, there is rarely a reason to go above ISO 400 for LEGO photography.
Aperture
Shoot at f/8 to f/11 for most reflection shots. This narrow aperture gives you enough depth of field to keep both your LEGO subject and its reflection sharp. If you want to blur the reflection artistically, open up to f/4 or f/2.8, but be aware that only part of your scene will be in focus.
Shutter Speed
For still water with perfect reflections, shutter speed is flexible since nothing is moving. I typically shoot at 1/60 to 1/125 with my lights. For freezing ripples, use 1/200 or faster. For creative motion blur on moving water, try 1/15 to 1/30 with a tripod to keep the LEGO model sharp while the water softens.
ND Filter
A neutral density filter reduces the amount of light entering your lens without changing the color. This lets you use slower shutter speeds or wider apertures in bright conditions. In LEGO photography, I use an ND filter when shooting outdoors with natural light and I want to smooth out water movement for a glassy, still surface effect. Indoors with controlled lighting, you rarely need one.
Polarizer Filter
A circular polarizer filter is incredibly useful for water photography because it controls how much reflection is visible on the water surface. Rotate the filter to increase or decrease the reflection strength. At maximum polarization, reflections disappear and you can see straight through clear water to what is below. At minimum polarization, reflections are at their strongest. This gives you creative control without changing your lighting setup.
Smartphone Camera Settings
If you are shooting on a smartphone, use a pro or manual camera app that lets you control ISO, shutter speed, and focus independently. Set ISO to the lowest available value (usually 50 or 100), tap to focus on your LEGO subject, and lock both focus and exposure before shooting. Clean your phone lens before every shoot, because smudges create hazy reflections that are especially visible in water photography.
For phone-based ripple shots, most phones have a burst mode that captures multiple frames rapidly. Use burst mode while creating ripples, then pick the frame with the best ripple pattern from the sequence.
Underwater LEGO Photography Techniques
Underwater LEGO photography opens up entirely new creative possibilities. Whether you want a scuba diver exploring a reef or a sea creature lurking beneath the surface, shooting below the waterline adds a layer of drama that surface shots cannot match.
For controlled underwater shots, I use a shallow container with 2 to 3 inches of water and shoot from above at a steep angle. The camera looks down through the water surface at the submerged LEGO model. To reduce surface glare that blocks the view, use a polarizer filter or position a diffused light directly above the container.
If you want to shoot from below the water surface, you need a waterproof camera or a waterproof housing for your phone. I have used a budget waterproof phone case with good results. Fill a clear container with water, place your LEGO model inside, and position the camera outside the container shooting through the transparent wall. This gives you an underwater perspective without risking your equipment.
Camera safety is a real concern here. Water and electronics do not mix. I always keep towels nearby, place my camera on a tripod rather than holding it over water, and never lean directly over a filled container with an unprotected camera. If water depth is more than 2 inches, I switch to a waterproof housing without exception.
For creative underwater scenes, try adding small bubbles using a syringe or eyedropper. Release bubbles near your submerged LEGO model to simulate an underwater breathing effect or a treasure chest opening. Bubbles catch light beautifully and add authenticity to diving scenes.
Common Mistakes to Avoid
I have made every mistake on this list over the years, and each one has cost me good shots. Here are the most common errors in LEGO photography water reflections and how to avoid them.
Using too much water movement: If you are constantly stirring or disturbing the water, you will never get a clean reflection. Let the water settle before every shot, and only disturb it intentionally when you want ripples. Patience is a skill in water photography.
Shooting from too high: A top-down angle kills reflections because the light bounces away from your camera instead of toward it. Get low. The lower your camera angle, the more reflection you will capture. I shoot most of my reflection scenes with the camera almost level with the water surface.
Using hard, undiffused lighting: Bare bulbs and direct flash create bright white spots on both the LEGO plastic and the water. These hot spots are distracting and difficult to fix in editing. Always diffuse your lights, even if it is just with a sheet of white paper.
Not protecting camera gear from water: Water splashes happen, especially when creating ripples or moving containers. Keep your camera on a tripod, keep towels within reach, and never place expensive electronics directly over a filled water container. A waterproof housing costs less than a camera repair.
Over-coloring the water: Adding too much food coloring or milk makes the water look artificial and blocks all reflections. Start with a single drop of color and add more gradually until you reach the desired effect. You can always add more, but you cannot easily remove it once it is in.
Ignoring water temperature: Cold water in a warm room creates condensation on your container and even on your camera lens. This fog ruins shots and can damage equipment. Use room-temperature water and allow your container to acclimate before shooting.
How to photograph water reflections?
To photograph water reflections, position your subject near still water, lower your camera to near eye level with the surface, use diffused lighting at 45-degree angles, and shoot at f/8 with low ISO. Let the water settle for several minutes before shooting to ensure the surface is perfectly still and the reflection is sharp.
How to photograph LEGO minifigures?
To photograph LEGO minifigures, shoot at eye level with the figure using a low camera angle, use diffused artificial lighting to avoid glare on the shiny plastic, keep ISO at 100-200 for clean detail, and use an aperture of f/8 for sufficient depth of field. Transparent LEGO bricks work well as invisible supports for water and floating scenes.
What is the LEGO 5 2 rule?
The LEGO 5 2 rule refers to the standard minifigure proportion where a minifigure is approximately 5 bricks tall plus 2 additional elements (the head and hair or headgear). This proportion matters in photography because it affects how you compose scenes and choose camera angles to make the miniature world look realistic.
How to take water reflection photos with phone?
To take water reflection photos with a phone, use a manual camera app to set ISO to the lowest value, tap to focus on the subject and lock exposure, hold the phone at a low angle near the water surface, and use soft diffused lighting. Clean the lens before shooting and use burst mode if you are capturing ripples.
Can I use real water with LEGO bricks?
Yes, you can use real water with LEGO bricks for short-term photography sessions. LEGO bricks are water-resistant and will not be damaged by brief contact with clean water. Dry the bricks thoroughly after shooting to prevent any mineral buildup. Avoid using hot water or leaving bricks submerged for extended periods.
How do I prevent water damage to my camera during LEGO photography?
To prevent water damage, keep your camera on a tripod rather than holding it over water, use a waterproof housing or case for phone cameras, keep towels nearby, limit water depth to 1 to 2 inches for reflection shots, and never lean directly over a filled container with unprotected equipment.
Start Creating Stunning LEGO Water Reflections
LEGO photography water reflections are one of the most rewarding techniques you can add to your toolkit. With a baking tray, some tap water, food coloring, and diffused lighting, you can create scenes that look professional and stand out in any feed. The key steps are simple: fill your container, position your model, get your camera low, diffuse your lights, and let the water settle.
Start with clear still water and a single minifigure to practice your reflection angle. Once you are comfortable, experiment with food coloring, milk mixtures, and ripples to build more complex scenes. Every shot teaches you something new about how light and water interact with these wonderful plastic bricks.
Grab your LEGO, fill a tray, and start shooting. The reflections are waiting.