
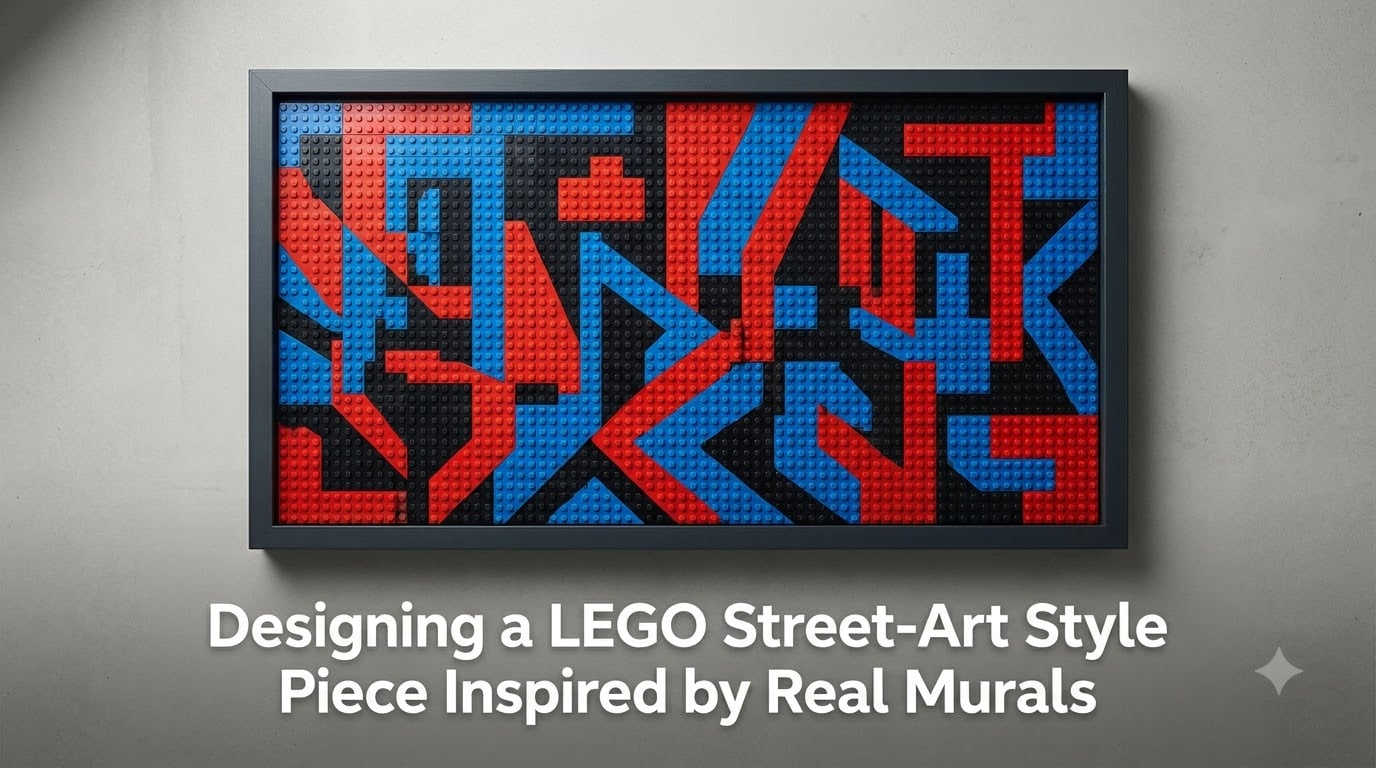
Street art and LEGO bricks share something fundamental: both turn simple units into bold visual statements. A spray-painted mural uses thousands of droplets of color to build an image. A LEGO mosaic uses thousands of plastic studs to do exactly the same thing. When you combine the two, the result is striking wall art that captures the energy of urban graffiti with the satisfaction of hands-on building.
I have spent the last three years converting real-world murals into LEGO street art mural design projects, and I have learned what works, what falls flat, and where most builders get stuck. This guide walks through the complete process from selecting a reference image to hanging the finished piece on your wall.
Whether you want to recreate a Banksy stencil, adapt a Keith Haring figure, or build something inspired by your local alley mural, the steps are the same. You will learn how to pick the right reference, scale it for a LEGO grid, match street-art colors to available bricks, choose between plates and tiles, handle structural concerns for large pieces, and build cleanly without losing your mind.
Table of Contents
Why Street Art Translates Beautifully to LEGO Bricks
Street art works because it is bold, high-contrast, and designed to read instantly from a distance. Those same qualities make it ideal for LEGO mosaic conversion. A photorealistic portrait with subtle skin gradients is brutal to render in 60 colors. A blocky, high-contrast stencil with hard edges? That is practically begging to be pixelated.
Think about what makes graffiti visually distinct: thick outlines, flat color fills, limited palettes, and dramatic contrast between figure and background. Now think about a LEGO baseplate covered in 1×1 plates. The medium naturally produces flat color fields with visible grid lines. Those grid lines can either fight your image or become part of the aesthetic.
The trick is choosing references that already lean into bold shapes rather than fine detail. A simple tag with two colors and an outline will look cleaner in bricks than a photorealistic aerosol portrait with 15 gradient shades.
Choosing the Right Mural Reference Image
Your reference image determines everything that follows, so this step deserves real attention. Not every mural converts well to bricks, and learning to evaluate images before you invest time and money saves enormous frustration.
What Makes a Good Reference for LEGO Conversion
The best references for LEGO street art mural design share four traits: strong silhouettes, limited color count, high contrast, and clean composition. Strong silhouettes mean you can squint at the image and still recognize the subject. If the shape disappears when you blur your eyes, it will disappear in bricks too.
Aim for images with five to eight dominant colors. Every additional color you introduce means sourcing another shade of brick and increasing your parts count. High contrast between your subject and background lets the LEGO grid work in your favor rather than against you. Clean composition with a clear focal point prevents the final mosaic from feeling muddy.
Avoid images with fine text, thin lines under three pixels wide, or smooth gradients spanning many shades. These elements do not survive the pixelation process. Graffiti that uses bold fills and solid outlines is your best starting material.
Famous Mural Artists Worth Studying
If you want inspiration, these artists’ work translates particularly well to LEGO mosaics because their styles already use bold shapes and limited palettes.
Banksy is the obvious starting point. His stencils rely on stark black-and-white contrast with occasional single-color accents. Pieces like the balloon girl or the rat with a peace sign reduce beautifully to two or three LEGO colors. The simplicity is the strength.
Keith Haring used thick black outlines filled with flat, bright colors. His figures are iconic and instantly recognizable even at very low resolutions, which makes them perfect candidates for smaller mosaics where you cannot afford fine detail.
Obey Giant artist Shepard Fairey works with constrained palettes and propaganda-style compositions. His Andre the Giant face or Hope portrait use red, black, cream, and tan. That four-color palette maps cleanly onto available LEGO colors.
Beyond these names, look at local murals in your own city. Many street artists work with stencils and bold fills that suit the medium. Photographing your own reference also avoids copyright concerns entirely.
Preparing and Scaling Your Image for a LEGO Grid
Once you have a reference, you need to prepare it for conversion. This is where most beginners skip steps and end up with disappointing results. Taking time here pays off in the build.
Resolution and Pixelation Fundamentals
A LEGO mosaic is a bitmap image where each stud represents one pixel. A 32×32 stud baseplate gives you a 32×32 pixel image, which is extremely low resolution. A 48×48 baseplate gives you 2,304 pixels. Even large multi-baseplate builds rarely exceed 96×96 studs.
At these resolutions, detail disappears fast. A face that looks detailed in a photograph becomes a blobby blur at 32 pixels across. Understanding this limitation before you commit to a design prevents disappointment later.
The key concept is effective resolution. Bold shapes with clear edges survive low resolution. Fine textures and subtle gradients do not. Always preview your image at the target resolution before ordering any bricks.
Step-by-Step Image Preparation
Follow these steps to prepare your mural reference for LEGO conversion:
Step 1: Crop your image to the aspect ratio of your planned build. A square baseplate needs a square crop. If you are building across two baseplates side by side, crop to a 2:1 rectangle.
Step 2: Boost contrast and saturation. Street art is vivid, and pixelation dulls colors slightly. Pushing contrast now helps the final mosaic retain punch. Increase saturation by 15 to 25 percent.
Step 3: Reduce the color count in your image using a posterize or palette reduction filter. Most image editors have this. Aim for 8 to 12 distinct colors. This forces the image closer to what the LEGO palette can reproduce.
Step 4: Resize the image to your target pixel dimensions using nearest-neighbor interpolation. This preserves hard pixel edges rather than blending them. At this point you should see roughly what the final mosaic will look like.
Step 5: Evaluate honestly. If the image is unrecognizable at target resolution, either increase your build size, simplify the reference, or choose a different image. Better to find out now than after buying 2,000 bricks.
Mosaic Conversion Tools Compared
Several free and paid tools convert images into LEGO-compatible mosaic layouts. Each has strengths depending on your workflow and budget.
LEGO Art Remix is a free web tool built specifically for custom mosaics. You upload an image and it generates a parts list, color map, and building instructions using the LEGO Art palette of about 40 colors. It outputs a BrickLink-compatible XML file for easy ordering. This is the best starting point for most builders because it handles color mapping automatically and costs nothing.
The official LEGO Mosaic Maker was a paid service through LEGO stores that converted a photo into a custom 32×32 mosaic set. While not always available, it demonstrated how the official palette handles conversion. The output is limited to the colors and piece types in the provided set, which constrains your palette.
BrickLink Studio is a full 3D LEGO building program that includes mosaic import functionality. It is free and powerful but has a steeper learning curve. Studio lets you choose from the full range of LEGO colors and element types, giving you more control than web-based tools. You can also generate parts lists and photorealistic renders before building.
For street-art specific work, I recommend starting with LEGO Art Remix for quick color mapping, then refining in Studio if you want finer control over element choices and layout. The combination gives you speed and flexibility.
Color Palette Planning for Street-Art Vibrancy
Color is where LEGO street art mural design lives or dies. Street art depends on punchy, saturated color. The LEGO palette has limits, and understanding those limits helps you work around them.
Working Within LEGO’s Available Colors
LEGO produces roughly 60 active colors at any given time, though many are rare or expensive to source. The commonly available palette sits closer to 40 colors. Digital images can display 16.7 million colors. That gap is the core challenge of mosaic building.
Every color in your reference image must be mapped to the nearest available LEGO color. Tools like LEGO Art Remix handle this automatically using color distance algorithms that find the closest match in CIE color space. The result is rarely identical to the original, but it is usually close enough to read correctly.
The limitation becomes a design constraint. Instead of fighting it, lean into it. Street art already uses flat color fills, so the LEGO palette restriction can actually enhance the poster-like aesthetic you are going for.
Matching Bold Street-Art Colors
Here are practical color matches for common street-art tones:
Bright red: LEGO Red (color 21) is the closest match and is widely available in 1×1 plates and tiles. For a deeper red, Dark Red (color 154) works but can be harder to source in quantity.
Electric blue: Medium Azure (color 322) captures that vivid sky-blue spray paint look. Bright Light Blue (color 212) is paler and works for highlights.
Hot pink: LEGO does not produce a true hot pink, but Dark Purple (color 85) and Bright Pink (color 353) can approximate magenta tones. This is one area where the palette genuinely limits street-art reproduction.
Black outlines: Pure Black (color 26) is essential for graffiti-style outlines. It is cheap and abundant. Use it generously for definition.
Cream backgrounds: Brick Yellow (color 5), which most builders call tan, works well for aged-wall or concrete backgrounds. White (color 1) gives clean gallery-wall contrast.
When a color does not exist in the palette, consider substituting a different bold color entirely. Street art is about impact, not accuracy. Swapping a missing orange for a bright yellow often looks intentional rather than wrong.
Brick Selection: Plates, Tiles, and Everything Between
The element type you choose for your mosaic affects the look, cost, and build experience. This decision matters more than most beginners realize.
1×1 Plates vs 1×1 Round Tiles
1×1 plates are the default choice for LEGO mosaics. They are cheap, abundant, and sit flat on a baseplate with their studs showing. The visible studs create a textured surface that catches light at different angles, adding subtle visual variation. Plates also come in the widest range of colors since they appear in countless sets.
1×1 round tiles sit flush with no visible stud, creating a smooth surface. This produces a cleaner, more painting-like appearance that suits some street-art styles better than others. The downside is cost and color availability. Round tiles are produced in fewer colors and cost more per piece than plates.
For graffiti-inspired work with bold fills, plates work great because the texture adds to the urban aesthetic. For smoother, more graphic designs like Haring figures, tiles give a cleaner finish. Many builders mix both: plates for backgrounds, tiles for focal subjects.
When to Mix Element Types
Advanced builders combine element types for texture and depth. Using 1×1 plates as the base layer and selectively adding round tiles, square tiles, or even small sloped elements on top creates dimensionality that a flat mosaic cannot achieve.
This technique is especially effective for street-art style pieces because real murals have physical texture. Spray paint builds up on surfaces, stencils leave edge artifacts, and weathered paint creates variation. Adding raised elements in key areas mimics this physical quality.
The trade-off is complexity and cost. Mixed-element mosaics require more planning, a longer parts list, and higher brick costs. Start with a uniform element type for your first build, then experiment with mixed elements once you are comfortable with the process.
Structural Considerations for Large Wall-Mounted Pieces
A 48×48 stud mosaic uses over 2,000 bricks and weighs several pounds. Hanging it securely requires planning from the design stage, not as an afterthought.
Baseplates vs Technic Frames
The traditional approach mounts 1×1 elements directly onto baseplates. Baseplates are thin, flexible, and come in standard sizes up to 48×48 studs. They are affordable and simple but can warp under the weight of thousands of plates, especially if hung vertically.
Technic brick frames solve the warping problem. By building a rigid border frame from Technic bricks and connecting baseplates to it, you create a structure that holds its shape. The official LEGO Art sets use this approach with Technic brick 65803 connectors that link baseplates into larger arrays.
For pieces larger than a single 48×48 baseplate, a Technic frame is not optional. It is essential. Without one, multi-baseplate builds sag, separate at the seams, and become impossible to mount cleanly.
Mounting and Hanging Solutions
Several mounting approaches work for LEGO mosaics, each with trade-offs.
Picture frames: Many builders mount their mosaic inside a deep picture frame with the glass removed. The frame hides baseplate edges and provides a ready-made hanging mechanism. IKEA RIBBA frames fit standard baseplate sizes with minor modification.
Command strips: For lighter pieces on a single baseplate, heavy-duty Velcro Command strips work well. Use four to six strips depending on weight. Test the hold for 24 hours before trusting it fully.
Screws through baseplate corners: The most secure option for heavy pieces. Drill small holes through the baseplate corners before building, then screw directly into wall anchors. The holes get covered by bricks during the build.
Whatever method you choose, account for the full weight of the finished piece. A 48×48 mosaic with plates weighs roughly 4 to 6 pounds. Multi-baseplate builds can exceed 15 pounds.
Step-by-Step Building Techniques for a Clean Mosaic
Building the mosaic is the fun part, but technique matters. Two thousand bricks placed carelessly look messy. The same bricks placed with attention look professional.
Building in Rows vs Quadrants
The row method builds the mosaic one horizontal row at a time, left to right, top to bottom. This is intuitive and mirrors how the image reads. The risk is drift: if you miscount by one stud early, every subsequent row is off.
The quadrant method divides the baseplate into four sections and builds each independently. This contains errors to one quadrant and makes it easier to compare your build against the reference image at each stage.
I recommend the row method for your first build because it is simpler. Switch to quadrants for larger or more complex pieces where error management becomes critical.
Use a brick separator frequently to nudge plates into alignment. Reddit builders in the r/lego community consistently recommend this tip. A slightly crooked plate throws off the row, and fixing it after 500 more plates are placed is painful.
Adding Texture and Depth
For street-art inspired pieces, consider these techniques to push beyond a flat mosaic:
Layered plates: Stack a second layer of plates in select areas to create raised elements. A raised outline around a figure mimics the dimensional quality of layered stencils in real street art.
Color variation in fills: Instead of using one color for a large area, alternate between two close shades. LEGO Bright Light Orange and Orange look almost identical individually but create a subtle speckle effect side by side that reads as spray-paint texture.
Transparent elements: A few trans-clear or trans-color plates scattered across a background simulate light reflection off a glossy painted wall. Use sparingly as accent, not as primary fill.
These techniques add complexity, so build your base mosaic first and add texture elements as a second pass. This keeps the core image intact while giving you room to experiment.
Common Mistakes and How to Avoid Them
After building dozens of these pieces and reading hundreds of forum posts, the same mistakes appear over and over. Here is how to avoid them.
Mistake 1: Choosing a reference with too much detail. A photorealistic mural with 20 colors and fine texture will look like noise at 32×32 resolution. Pick bold, simple references. Less is genuinely more in this medium.
Mistake 2: Not previewing at target resolution before buying bricks. Always resize and pixelate your image first. If it does not look right on screen, it will not look right in plastic. This single step saves wasted money.
Mistake 3: Ignoring structural planning until the build is finished. Decide your mounting method before placing a single brick. If you need to drill holes or build a Technic frame, that affects how you start.
Mistake 4: Sourcing bricks one at a time. Use BrickLink to buy bulk lots by color. Buying 200 red 1×1 plates from one seller costs a fraction of buying them individually across multiple orders. Plan your parts list, then batch your purchases.
Mistake 5: Building without sorting first. Sort all bricks by color before starting. Forum builders on Eurobricks consistently report that color-sorted trays cut build time in half and reduce placement errors dramatically.
FAQs
How do you make LEGO art?
To make LEGO art, choose a reference image, crop and adjust it for contrast, convert it to a limited color palette matching available LEGO colors, resize it to your target baseplate dimensions, generate a parts list using a tool like LEGO Art Remix or BrickLink Studio, source the bricks through BrickLink or Pick a Brick, then build brick by brick on a baseplate following your color map.
How do you turn a picture into a LEGO mosaic?
Upload your prepared image to a mosaic conversion tool like LEGO Art Remix. The tool pixelates the image to your chosen dimensions, maps each pixel to the nearest available LEGO color, and generates a building grid plus a BrickLink-compatible parts list. You then build the mosaic by placing one brick per pixel on a baseplate.
What is the 5/2 rule in LEGO?
The 5/2 rule in LEGO building refers to a structural technique where you overlap bricks in a staggered pattern so that seams never line up between adjacent layers. This creates stronger, more stable connections and is especially important for large wall-mounted mosaics where structural integrity matters.
What bricks should I use for a LEGO mural?
1×1 plates are the standard choice for LEGO murals because they are cheap, available in many colors, and sit cleanly on baseplates. 1×1 round tiles create a smoother finish but cost more and come in fewer colors. For your first mural, use uniform 1×1 plates and experiment with mixed element types as you gain experience.
How do I scale artwork for a LEGO mosaic?
Determine your baseplate size first, then resize your reference image to match those pixel dimensions using nearest-neighbor interpolation. A 32×32 baseplate creates a 32×32 pixel image. Crop your image to the correct aspect ratio, reduce colors to 8 to 12 shades, then resize to your target resolution to preview the result before building.
Can I recreate famous street art in LEGO without copyright issues?
Recreating famous copyrighted artworks for personal display is generally fine, but selling or publicly posting photos of derivative works may violate copyright. To stay safe, photograph your own street-art references, use Creative Commons images, or create original designs inspired by an artist’s style rather than copying specific pieces directly.
Start Building Your Own LEGO Street-Art Piece
Designing a LEGO street art mural design piece inspired by real murals comes down to a few core principles: choose bold references with limited colors, preview at target resolution before buying anything, work within the LEGO palette rather than against it, and plan your structure before you build.
Start small with a single 32×32 baseplate and a simple two or three color stencil design. Once you understand the process, scale up to multi-baseplate builds with richer palettes and texture techniques. The skills transfer directly.
Grab a reference image that speaks to you, fire up LEGO Art Remix, and start planning your parts list. Your wall is waiting for something more interesting than a store-bought print.